국제화 도입하기
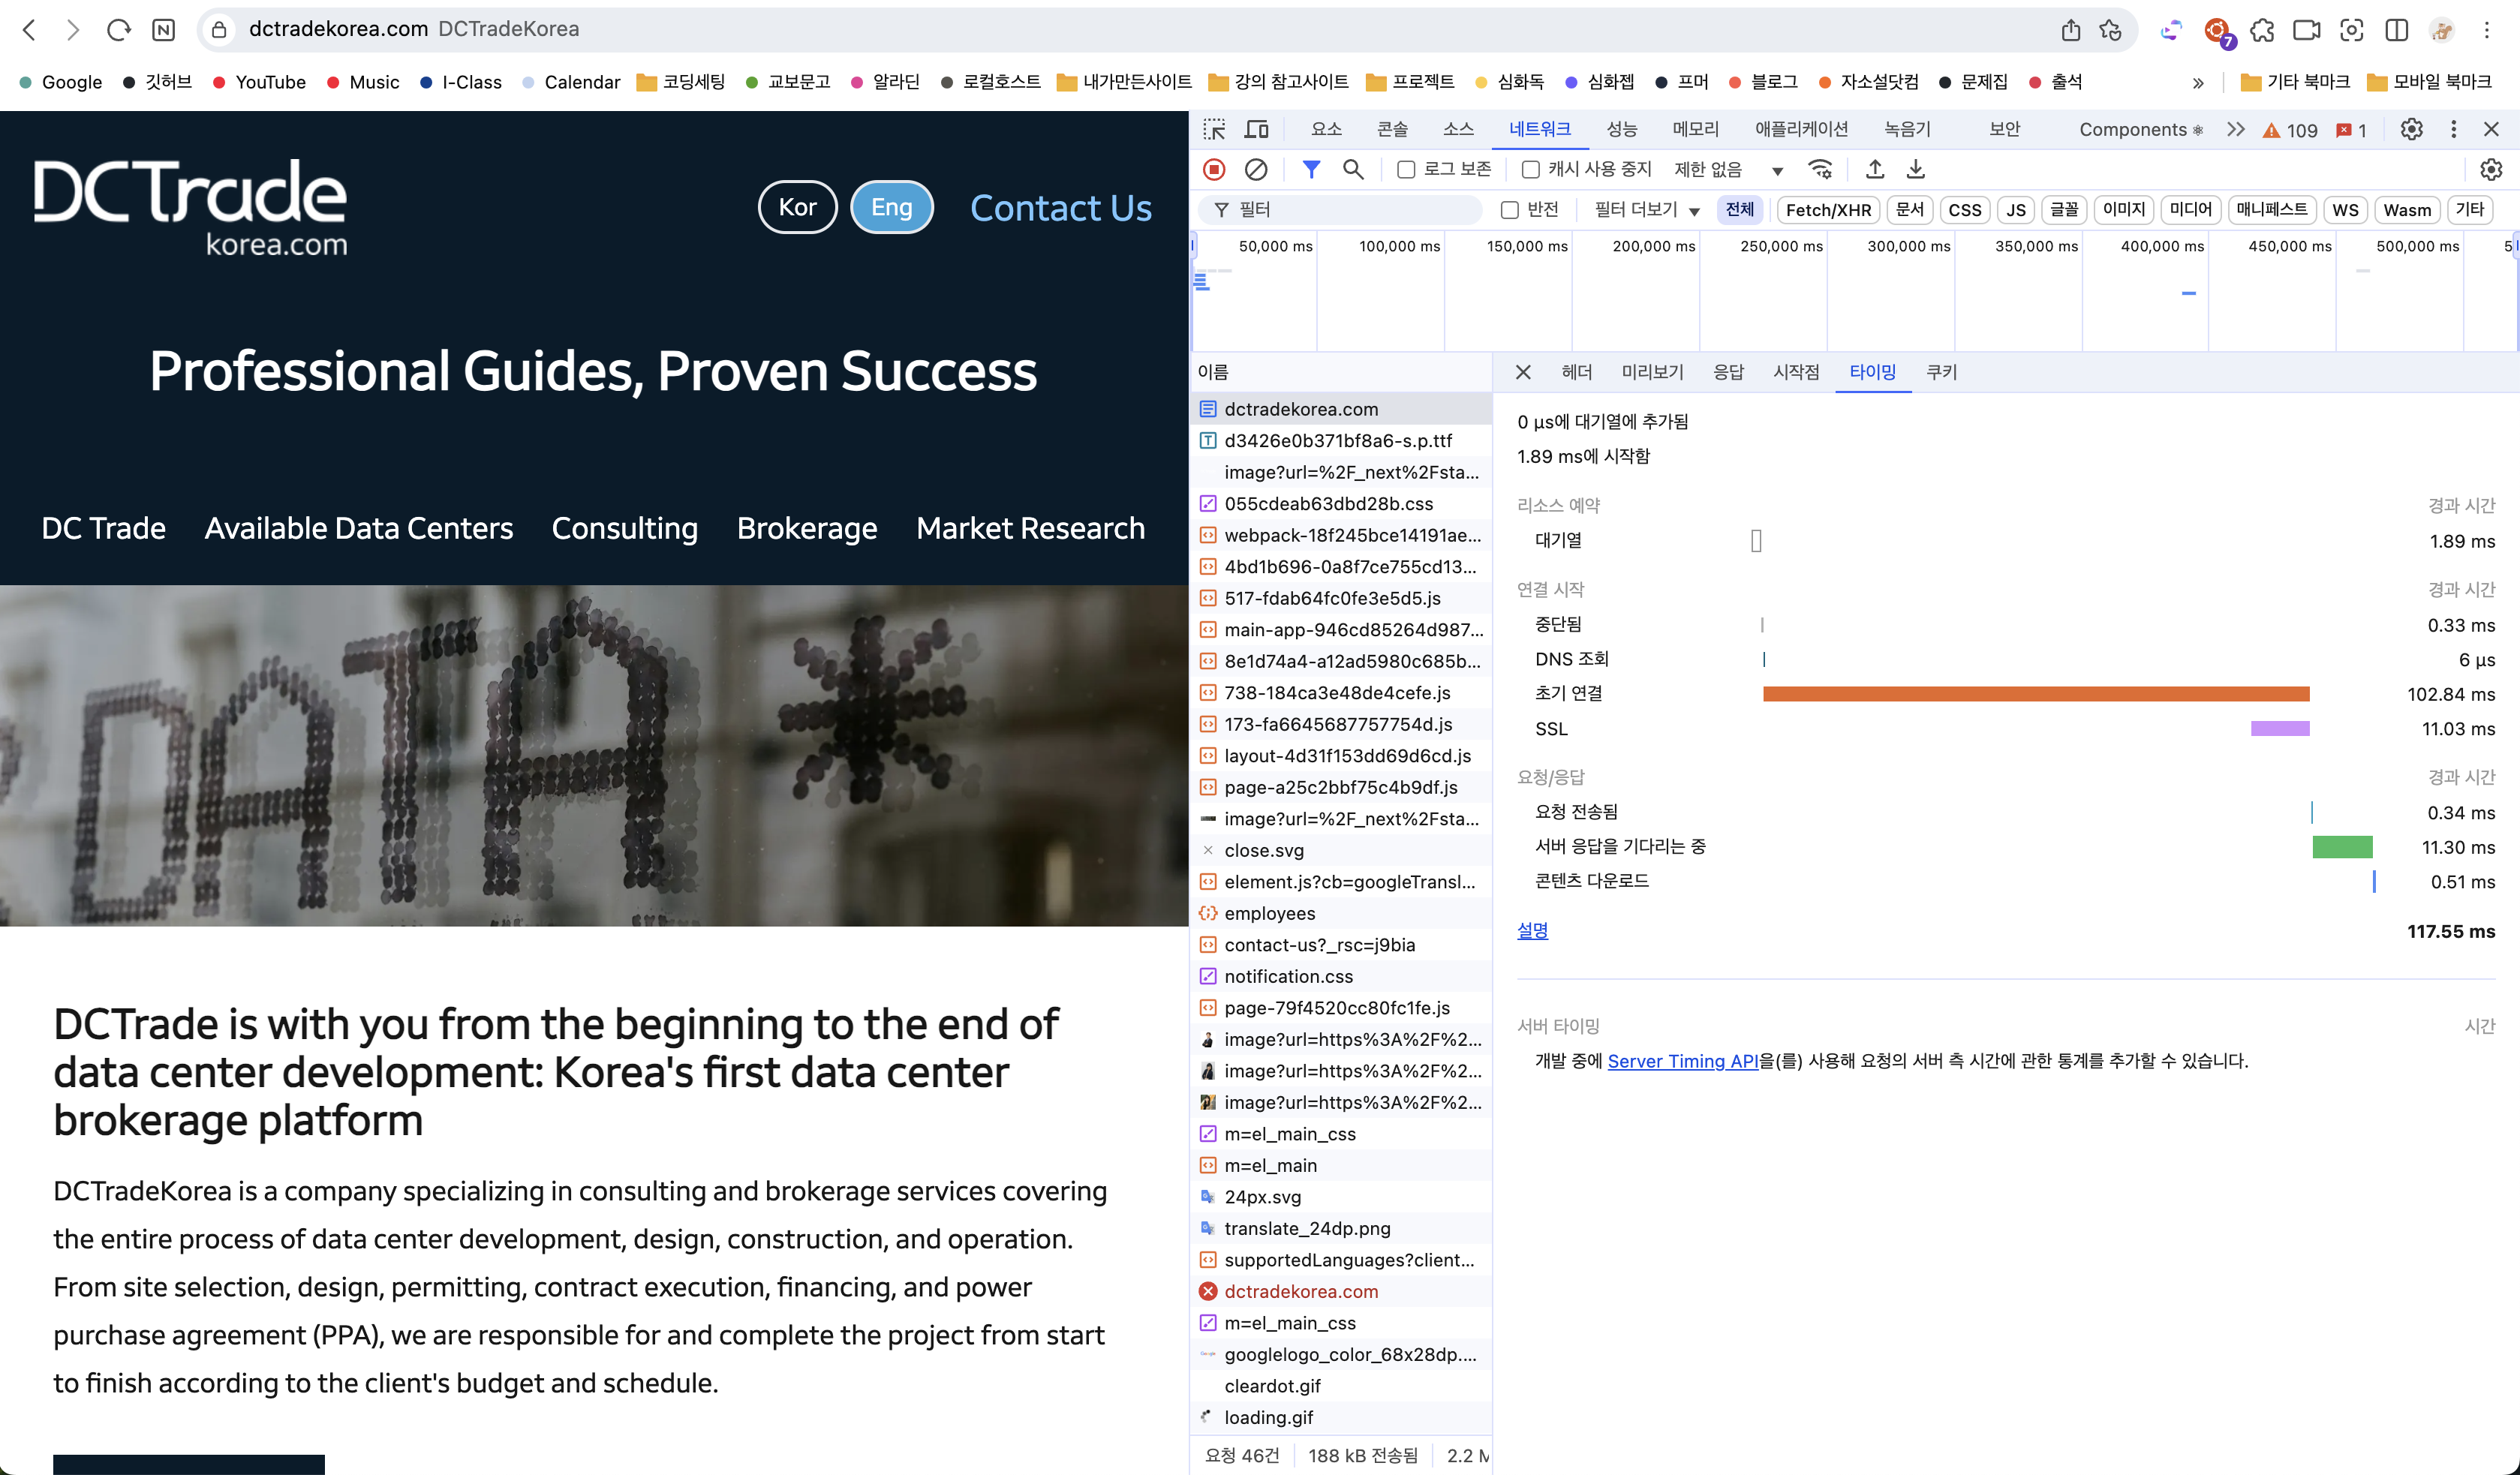
기존에 운영하던 웹사이트에 국제화 기능을 추가하게 되었다. 기존 사이트는 영문 버튼을 누르면 google translate API가 작동하는 방식이었다.
문제점
1. 어색한 번역
아무래도 번역기를 돌리는 방식이라 번역이 매우 어색했다. 한글 문단을 인식해 번역해 번역되면 안되는 부분(회사명 같은 부분)도 같이 번역되었다. 사이트 타겟층이 우리나라만 있는것이 아니라 틀린 영문법이 보이는걸 갱장히 싫어하셨다,,,
2. 느린 속도
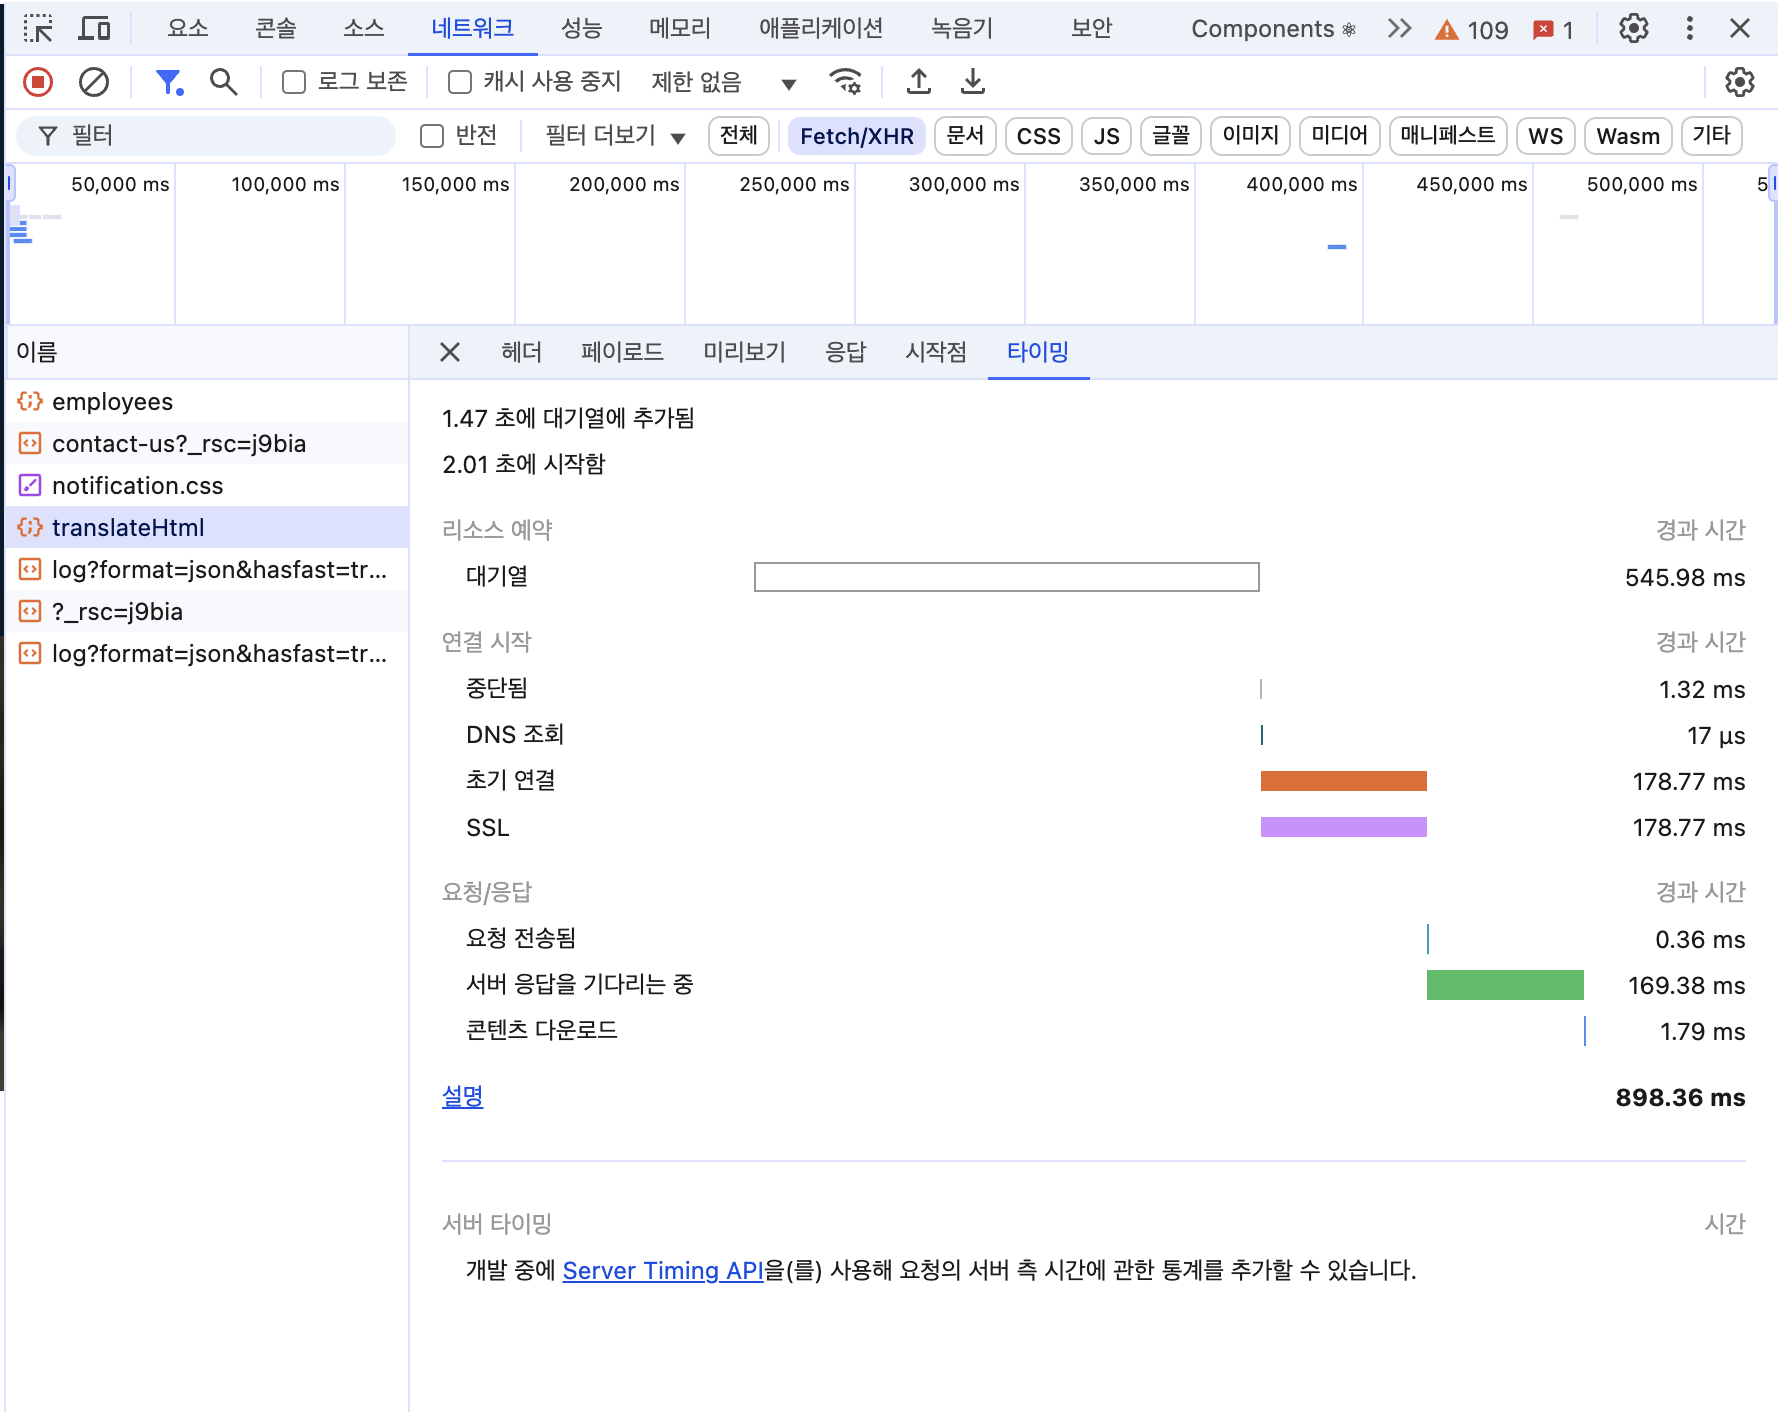
google translate API를 사용한 번역 기능은 페이지에 렌더링된 한글을 인식해 영어로 번역하는 방식이기 때문에 시간이 오래걸렸다. 다른페이지로 이동후 기존 사이트로 이동해도 다시 번역되어 시간이 걸렸다.
Next.js 국제화
방법 1. 영어 컴포넌트만 추가하기
<p>{lang === "ko" ? "안녕하세요" : "Hello"}</p>가장 간단한 방법이다. 기존 파일도 전부 한글이 하드코딩 되어있어서 거기에 영문 버전 컴포넌트만 추가하면 된다… 하지만 1) 코드 길이가 길어져 가독성이 안좋아지고, 2) 영문 이외 다른 언어를 추가할 때 이후 유지보수를 생각해서 라이브러리를 적용하기로 했다.
방법 2. 라이브러리 사용하기
기존 사이트는 Next.js로 만들어져 찾아보니 여러가지 국제화 라이브러리들이 있었다. 대표적으로 next-i18next, next-intl, next-translate가 있었다.
~~문제는 나 포함 인턴들이 백엔드 개발자라 Next.js는 문외한이라는 것이었다… 결국 러닝커브때문에 도입까지 이틀이 걸렸다. ~~ 세 가지 라이브러리 중 next-intl을 선택했고 Docs를 찬찬히 뜯어보며 국제화를 시작했다.
next-intl 도입
- 먼저 프로젝트에 next-intl을 import 하고 파일 구조를 아래와 같이 맞춰준다.
npm install next-intl├── messages
│ ├── en.json
│ └── ...
├── next.config.ts
└── src
├── i18n
│ ├── routing.ts
│ ├── navigation.ts
│ └── request.ts
├── middleware.ts
└── app
└── [locale]
├── layout.tsx
└── page.tsx
- messages 폴더에 언어별 json 파일을 생성한다.
// en.json
"Home": {
    "message" : "hello",
}

// ko.json
"Home": {
    "message" : "안녕하세요",
}
동일한 key 값과 매칭되는 value를 저장해주었다.
- next.config.ts
import {NextConfig} from 'next';
import createNextIntlPlugin from 'next-intl/plugin';

const nextConfig: NextConfig = {};

const withNextIntl = createNextIntlPlugin();
export default withNextIntl(nextConfig);- routing.ts
import {defineRouting} from 'next-intl/routing';
import {createNavigation} from 'next-intl/navigation';

export const routing = defineRouting({
  // A list of all locales that are supported
  locales: ['en', 'ko'],

  // Used when no locale matches
  defaultLocale: 'ko'
});- navigation.ts
import {createNavigation} from 'next-intl/navigation';
import {routing} from './routing';

// Lightweight wrappers around Next.js' navigation
// APIs that consider the routing configuration
export const {Link, redirect, usePathname, useRouter, getPathname} =
  createNavigation(routing);
기존에 사용하던 navigation들도 next-intl/navigation으로 바꿔주었다.
- middleware.ts
import createMiddleware from 'next-intl/middleware';
import {routing} from './i18n/routing';

export default createMiddleware(routing);

export const config = {
  matcher: [
	'/', // 루트 경로
	'/(ko|en)/:path*', // 국제화 경로
	'/((?!api|_next/static|_next/image|favicon.ico).*)'
]
};
기존 미들웨어도 수정하여 기존 경로로 들어오는 요청들을 국제화 경로로 매핑되도록 수정하였다.
- request.ts
import {getRequestConfig} from 'next-intl/server';
import {hasLocale} from 'next-intl';
import {routing} from './routing';

export default getRequestConfig(async ({requestLocale}) => {
  // Typically corresponds to the `[locale]` segment
  const requested = await requestLocale;
  const locale = hasLocale(routing.locales, requested)
    ? requested
    : routing.defaultLocale;

  return {
    locale,
    messages: (await import(`../../messages/${locale}.json`)).default
  };
});- 페이지에서 사용
import {useTranslations} from 'next-intl';
const t = useTranslations("Home")
useTranslations를 Import하고 불러올 json의 key값으로 설정해준다.
{t('message')}이런 식으로 사용하면 끝이다. 현재 설정된 locale에 따라 json 파일에서 값을 읽어온다.
개선된 점
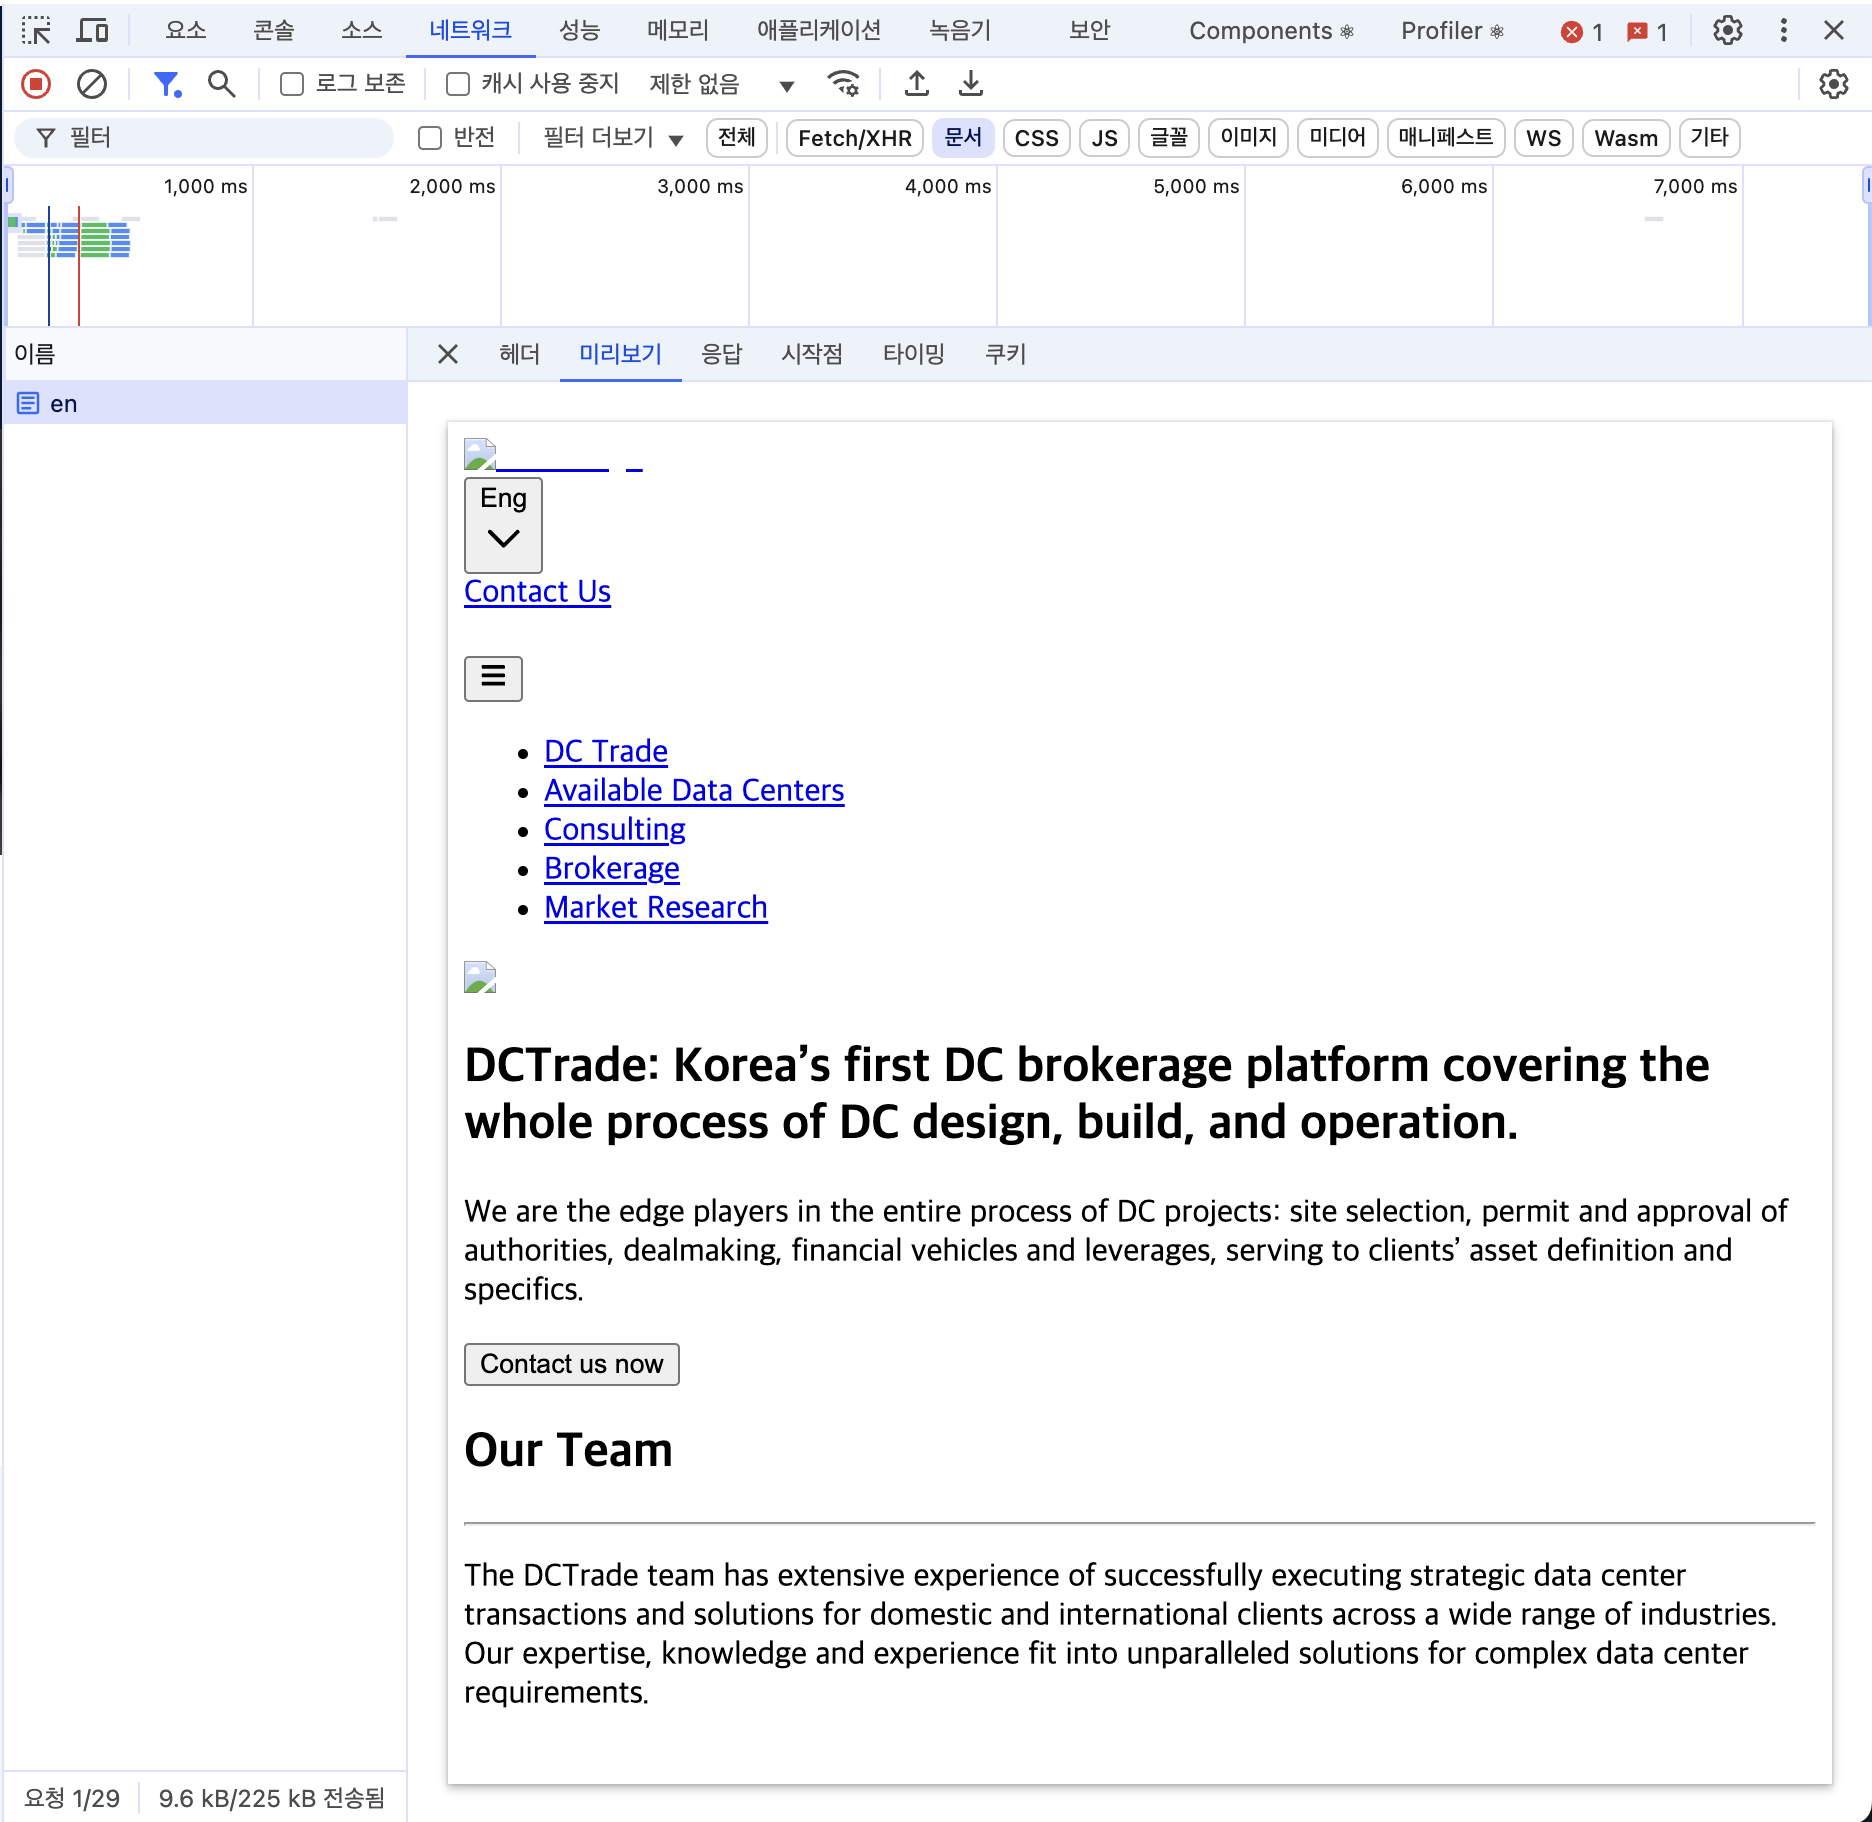
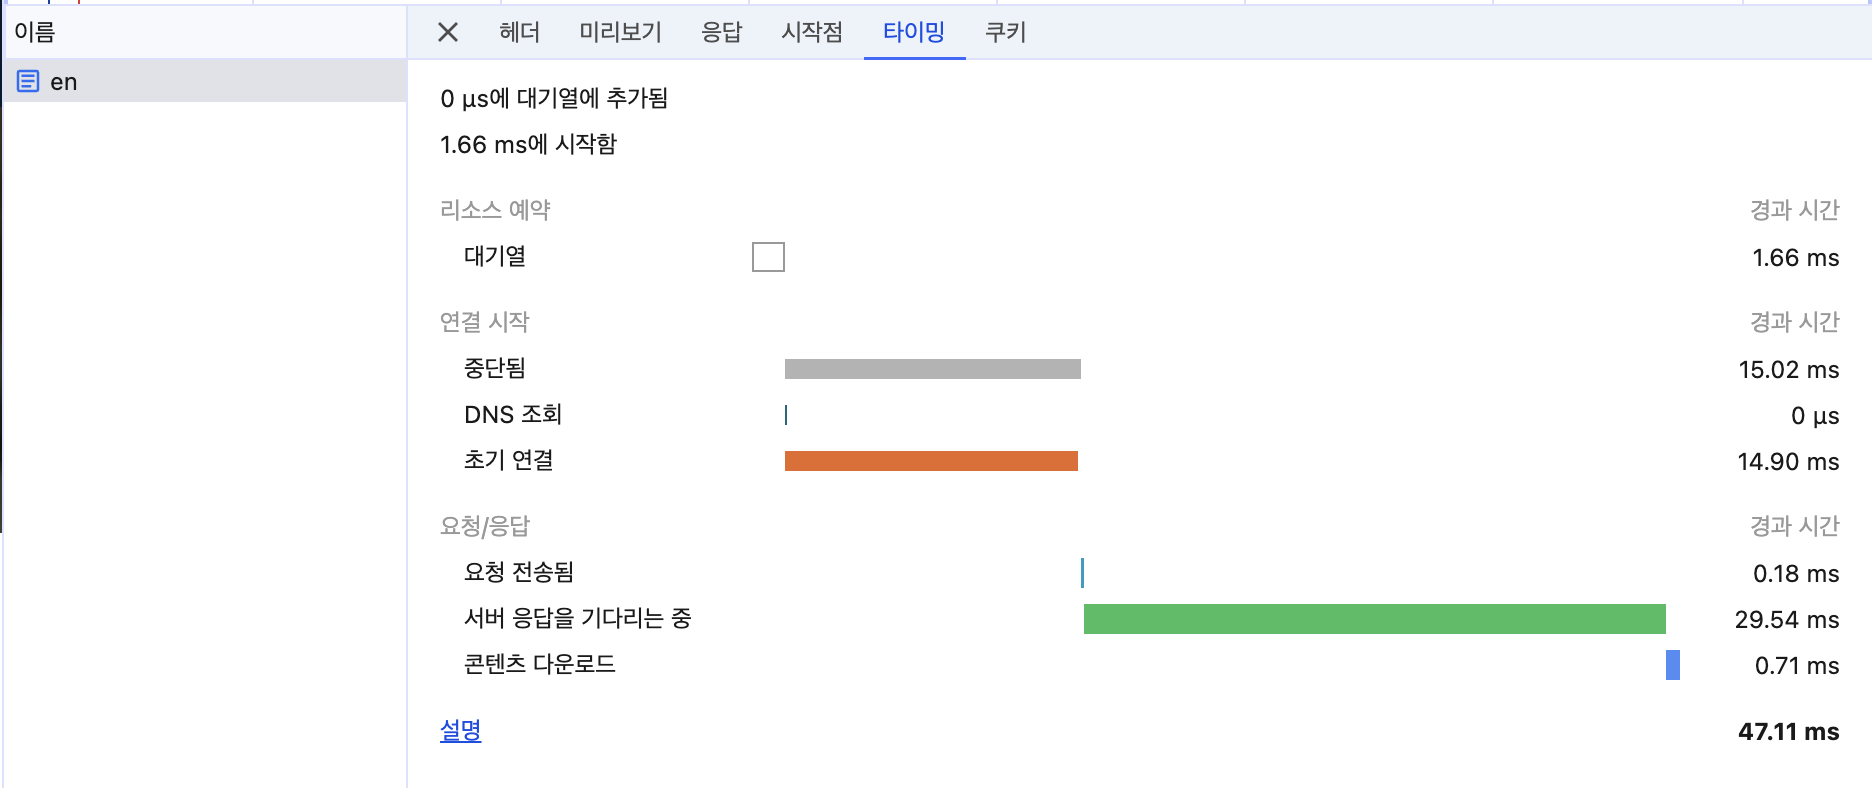
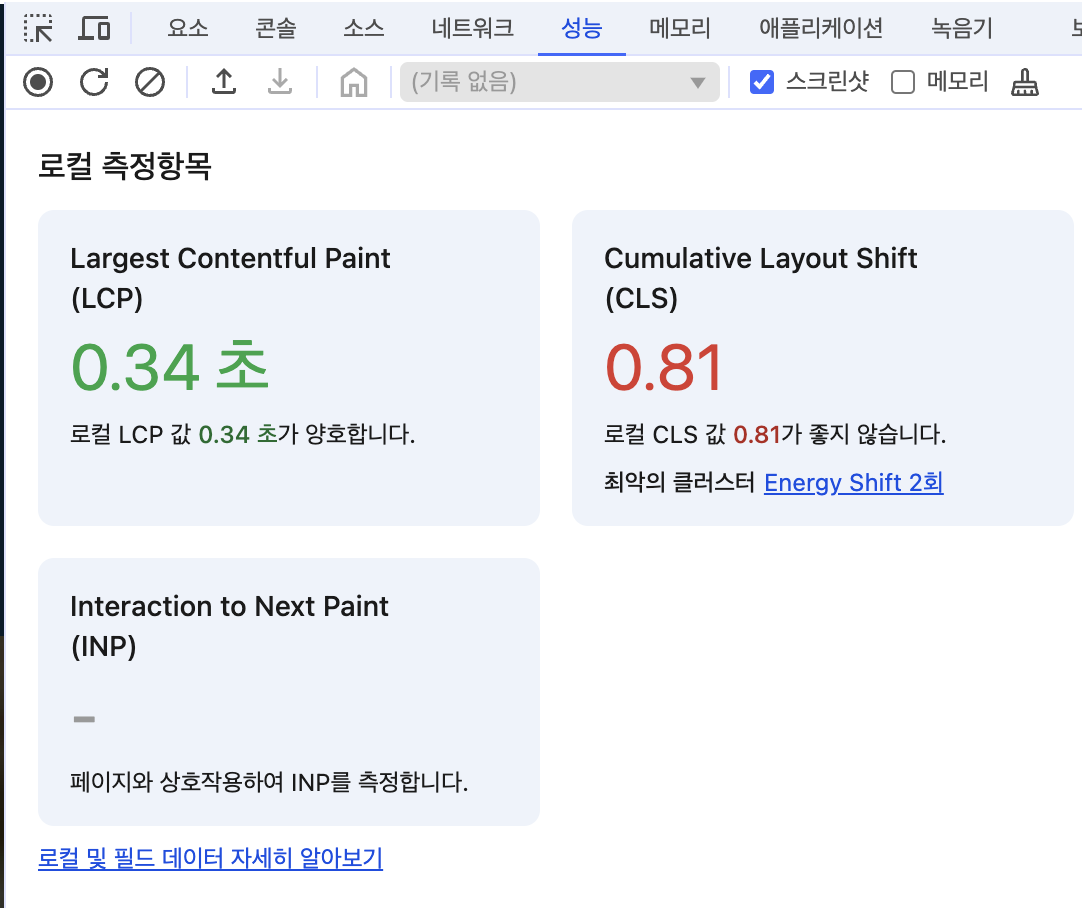
기존 첫 html 렌더링 84ms에, 번역 시간 400ms 정도 걸리던 시간을 47.11ms로 단축할 수 있었다. 또 영어도 번역기 영어가 아닌 직접 영어 문단을 수정할 수 있었다.
마무리
Next.js는 너무 오랜만이라 기술 도입에 시간이 좀 걸린 것 같다.. 또 Next.js는 프론트로만 사용해봤지 백엔드 로직까지 함께 있는 프로젝트는 처음이었지만 어떤 식으로 구성되었는지 확인할 수 있었다. 또 내가 만든 사이트가 실제로 운영된다는 점이 제일 신기하고 재미있었다. 기회가 된다면 Next.js와 TypeScript도 배워서 풀스택으로 전향하고 싶다.